Sample Selection: A Shortcut To Great Mixes
Your mix quality starts with sample selection. Discover why choosing the right sounds upfront saves hours of mixing time and delivers professional results faster than any plugin chain.
Your Mix Starts with Smart Sample Selection
Learn more about best space prison movies: sci-fi incarceration classics
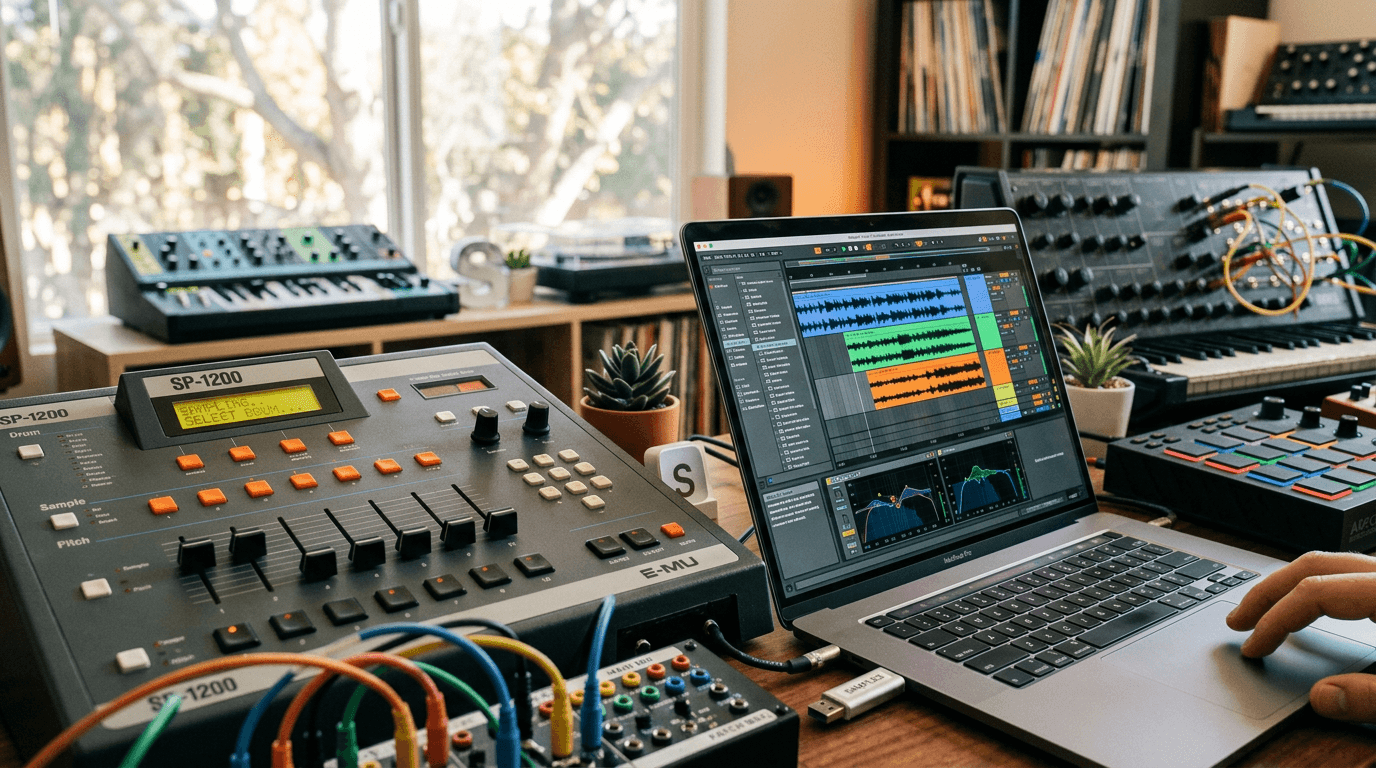
Your mix starts sounding better the moment you choose the right samples. In modern music production where most instruments live inside your DAW, sample selection determines whether you spend hours fixing problems or minutes polishing perfection. The quality of your source material dictates the ceiling of your final mix, making smart sample choices your most powerful production tool.
Why Does Sample Selection Matter More Than Processing?
Producers often reach for EQ and compression before questioning their sample choices. This backward approach wastes time and delivers mediocre results. A well-selected kick drum needs minimal processing, while a poor one never sounds right no matter how many plugins you throw at it.
The digital production landscape has shifted dramatically. Modern genres like trap, house, and electronic pop rely almost entirely on samples and synthesized sounds. Your sample library essentially becomes your instrument collection, and choosing from it requires the same care a session musician applies when selecting guitars or drum heads.
The 80/20 Rule of Sample Selection
Industry professionals follow an unwritten rule: spend 80% of your time selecting samples and 20% processing them. This ratio flips the amateur approach on its head. When you nail the source material, mixing becomes intuitive rather than corrective.
Great samples share common characteristics:
- Clean transients that cut through dense arrangements
- Appropriate frequency content for their role in the mix
- Minimal unwanted resonances or harsh frequencies
- Compatible tonality with other elements
- Professional recording quality and bit depth
How Do You Choose Samples That Mix Themselves?
Successful sample selection starts with understanding your mix context. A kick drum that sounds massive in isolation might disappear when paired with a heavy bassline. Always audition samples within your actual project, not in solo mode.
For a deep dive on michael biopic shatters records with $97m opening weekend, see our full guide
Create a reference folder of samples you know work well together. Professional producers build custom kits over time, organizing proven combinations that require minimal adjustment. This workflow accelerates your production process and maintains consistency across projects.
Listen for Frequency Balance First
For a deep dive on guitar deals: up to 15% off pedals, amps and more, see our full guide
Before considering vibe or character, analyze the frequency spectrum. A snare with excessive low-mid buildup will muddy your mix regardless of how punchy it sounds alone. Use a spectrum analyzer during sample selection to identify potential problem areas before committing.
Pay special attention to the fundamental frequency and harmonic content. Samples with clear, defined fundamentals sit better in arrangements than those with smeared or unclear pitch centers. This clarity becomes critical when layering multiple elements in the same frequency range.
Match Samples to Your Genre Standards
Every genre has sonic expectations. Trap kicks need sub-bass extension below 60Hz, while house kicks often emphasize the 80-120Hz range. Study professional releases in your target genre and identify the frequency characteristics that define their sound.
Your sample choices should reflect these standards while maintaining your unique voice. Download reference tracks and A/B your samples against them. This comparison reveals whether your selections will compete in the commercial landscape.
What Makes Sample Layering Work?
Single samples rarely deliver the complexity modern productions demand. Layering lets you combine the best characteristics of multiple samples into one cohesive sound. The key lies in selecting complementary layers rather than competing ones.
Choose samples that occupy different frequency ranges. A punchy kick top layer (2-5kHz) pairs perfectly with a sub-focused bottom layer (30-80Hz). This separation prevents masking and creates a fuller, more dimensional sound than any single sample could achieve.
How Do You Know If Samples Work Together?
Compatible samples share similar tonal qualities even when covering different frequency ranges. Listen for matching attack characteristics and decay times. A sharp, snappy hi-hat clashes with a soft, round kick drum, creating rhythmic confusion rather than cohesion.
Test your layers in context immediately. Solo mode lies about how elements interact. What sounds perfect alone often conflicts when combined with bass, synths, and vocals. Trust your ears in the full mix environment.
Building a Curated Sample Library
Organization separates professional workflows from amateur chaos. Create a system that lets you find the perfect sample in seconds, not minutes. Tag samples by key characteristics: tonal, punchy, dark, bright, vintage, modern.
Delete ruthlessly. A library stuffed with mediocre options slows decision-making and encourages settling for "good enough." Keep only samples you would actually use in a finished production. Quality beats quantity every time.
Processing Samples Before Your Session
Smart producers pre-process their favorite samples during downtime. Remove DC offset, trim silence, and normalize levels. This preparation ensures samples sit properly in your mix from the first drag-and-drop.
Consider creating processed versions of go-to samples. Save variations with different EQ curves or compression settings. This approach gives you instant options without disrupting creative flow during production sessions.
What Are the Biggest Sample Selection Mistakes?
Choosing Samples in Solo Mode
This trap catches even experienced producers. A sample that sounds incredible alone might lack the characteristics needed to cut through a dense arrangement. Always audition within your project context, with at least the kick and bass playing.
Your ears adjust to solo'd sounds differently than mixed environments. What seems perfect in isolation often reveals problems when competing with other elements. Make sample selection decisions based on real-world mixing conditions.
Ignoring Phase Relationships
When layering samples, phase cancellation can hollow out your sound. Check phase correlation meters when combining kicks, snares, or any layered elements. A simple polarity flip often transforms a weak layer into a powerful addition.
Some samples naturally phase-align better than others. Build a mental catalog of combinations that work well together. This knowledge speeds up your workflow and prevents frustrating troubleshooting sessions.
Overlooking Dynamic Range
Heavily compressed samples limit your mixing options. Choose samples with natural dynamics when possible, then apply compression to taste. This approach maintains flexibility and prevents the lifeless, over-squashed sound that plagues amateur productions.
Dynamic samples also respond better to parallel processing techniques. You can create punchy, aggressive versions while maintaining the natural character of the original. Pre-crushed samples offer no such flexibility.
Advanced Sample Selection Techniques
Professional producers often process samples through analog gear or outboard equipment before importing them into projects. This technique imparts character impossible to achieve with plugins alone. Even simple saturation or subtle EQ through quality hardware elevates sample quality significantly.
Experiment with resampling techniques. Run a basic kick through your favorite reverb, resample it, then use that as a layer. This creative approach generates unique textures while maintaining the controlled environment of your DAW.
Using Reference Tracks for Sample Decisions
Load a professional track in your genre onto a separate channel. Match your sample selections to the tonal characteristics and frequency balance of this reference. This comparison keeps your choices aligned with commercial standards.
Pay attention to how samples interact in reference tracks. Notice the space between elements and how each sound occupies its own frequency pocket. Replicate these relationships through careful sample selection rather than heavy processing.
Master Sample Selection for Better Mixes
Sample selection represents the foundation of modern music production. By investing time in choosing the right sounds upfront, you eliminate hours of corrective mixing and achieve professional results faster. Great mixes start with great sources, and no amount of processing can fix fundamentally flawed sample choices.
Continue learning: Next, explore the west forgot how to make things, now it's forgetting h...
Build a curated library, audition samples in context, and trust your ears to guide you toward selections that naturally work together. Your mixing skills matter, but smart sample selection gives you an unfair advantage before you touch a single plugin.
Related Articles

AI Hits the Charts: How Neural Networks Craft Songs
Discover how AI and neural networks are transforming music production, creating hit songs, and setting new industry standards.
Sep 6, 2025

Tech's Role in Florida's Vaccine Mandate Debate
Florida's move to eliminate vaccine mandates underscores the critical role of tech in public health. Discover the intersection of innovation and policy.
Sep 4, 2025
Revolutionizing Home Studios with 3D Spatial Audio
Dive into the world of 3D spatial audio and revolutionize your home studio with cutting-edge production techniques and gear.
Sep 6, 2025