Ableton Live, Push, and Move: The Perfect Workflow Trio
Discover how to build a complete music production workflow using Ableton Live, Push, and Move together. This guide shows you how each tool fills a specific creative gap.
Understanding the Ableton Ecosystem Challenge
You have Ableton Live running on your computer, and you know it's powerful. But clicking a mouse and staring at a screen for hours kills creativity.
You want hands-on control for beat-making, a way to sketch ideas away from the studio, and seamless performance capabilities that let you take your productions to the stage. The Ableton trio — Live, Push, and Move — solves this problem by dividing your workflow into three complementary zones.
Live handles the deep editing and arrangement. Push gives you tactile, hardware-based music creation at your desk. Move lets you capture ideas anywhere, then sync them back to your main projects. Each device fills a specific gap in the modern producer's workflow.
This guide walks you through building a complete production system using all three tools.
Step 1: Set Up Ableton Live as Your Central Hub
Start by configuring Live as your command center. Install the latest version on your primary production computer and organize your project folders with a consistent naming structure.
see also: eventide h9 gen2: multi-effect pedal gets major update
Create template projects for different workflows: one for beat-making sessions, another for songwriting, and a third for live performance. Within each template, set up return tracks for your most-used effects.
Route your audio and MIDI tracks to color-coded groups. This organization pays off when you switch between Push and Move, because both devices inherit Live's project structure. Enable Cloud sync in Live's preferences if you plan to move between Move and your studio setup frequently.
Step 2: Integrate Push for Hands-On Production
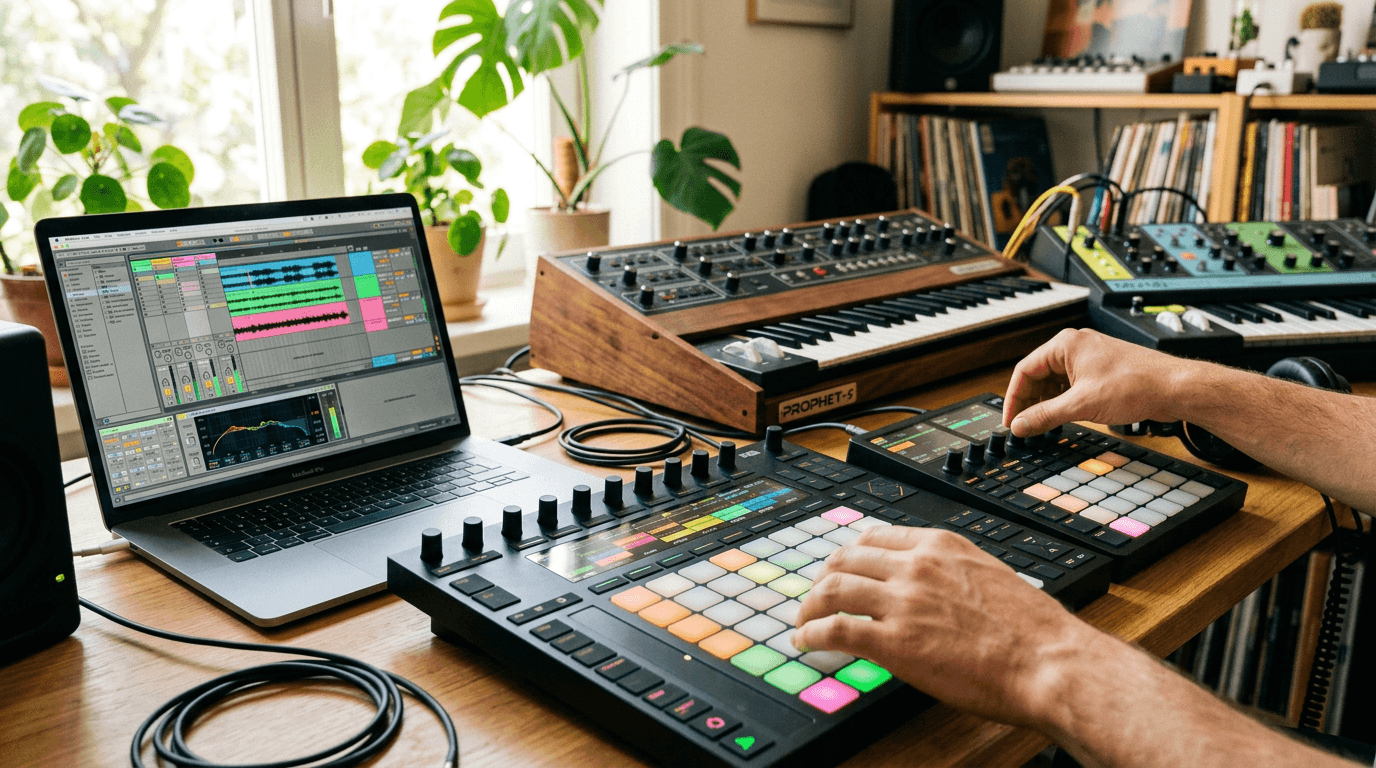
Connect Push directly to your computer via USB. Live recognizes it instantly and maps all controls automatically. The hardware becomes an extension of your DAW, letting you work without touching your mouse or keyboard.
Start your beat-making sessions in Push's Note Mode. The pad grid lights up to show your selected scale, eliminating wrong notes and speeding up melodic ideas. Press pads to trigger sounds, twist encoders to shape parameters, and use the touch strip for pitch bends.
Switch to Session View mode on Push to build loops and scenes. Each pad represents a clip, and colors match your Live arrangement. Launch clips by hitting pads, adjust volumes with the encoders above each track, and record automation by moving knobs while your pattern plays.
The device view on Push's screen shows every parameter of your selected instrument or effect. Scroll through pages using the navigation buttons, and map the eight encoders to any parameter you want immediate access to. This removes the need to dive into computer menus during creative flow.
Step 3: Capture Ideas on Move Away from the Studio
Move operates as a standalone music-making device. Charge it fully, load it with sounds from your Live library, and take it wherever inspiration strikes. The device runs a streamlined version of Live's engine, so your instruments and effects work identically to your studio setup.
go deeper on kawai k1: the budget d-50 that conquered the late '80s
Create new projects directly on Move's touchscreen. Tap to add tracks, drag to arrange clips, and use the grid to input notes. The interface simplifies Live's layout for mobile use while maintaining the same session-based workflow.
When you capture a promising idea, Move saves it as a standard Live Set. The next time you connect to your computer or sync via Cloud, that project appears in Live with all MIDI data, audio recordings, and effect chains intact. You can then expand the sketch using Push and Live's full feature set.
Move's built-in battery powers several hours of production. Use this time on flights, in hotel rooms, or in outdoor locations to break out of studio routines.
Step 4: Build a Complete Track Using All Three Tools
Start your track on Move during a commute or break. Sketch a basic drum pattern, add a bass line, and record a vocal melody idea. The portability removes pressure and lets you experiment freely.
Transfer the project to Live when you return to your studio. Open the Move-created Set and immediately see all your clips arranged in Session View. Now add complexity: layer additional instruments, record live guitars or vocals through your audio interface, and apply CPU-intensive effects that Move can't handle.
Switch to Push once your arrangement takes shape. Use the hardware to perform your track in real-time, triggering scenes and tweaking parameters. Record these performances as automation in Live. Push's immediate tactile response helps you find dynamic variations that mouse-clicking never reveals.
Move between the three tools as needed. Refine arrangements in Live, add new melodic parts on Push, and test mix changes on Move's headphone output to hear how your track translates to portable listening.
Step 5: Optimize for Live Performance
Convert your studio project into a performance set by consolidating clips and freezing tracks in Live. This reduces CPU load and prevents crashes during shows.
Create clear scene markers for different song sections: intro, verse, chorus, breakdown, and outro. Map Push's pads to launch these scenes in sequence. Assign the encoders to filter cutoffs, reverb sends, and delay feedback for live effect manipulation.
Use the touch strip for dramatic filter sweeps and pitch drops. Push becomes your performance instrument, requiring no laptop interaction once you start playing. Bring Move as a backup device or secondary controller.
Also read: audio shitposting: meme culture in music production — background
Rehearse your set using all three tools. Practice transitions in Live while watching the arrangement, then perform those same transitions on Push without looking at the screen. This builds confidence for dark stages where laptop screens cause eye strain.
Step 6: Maintain Your Integrated Workflow
Keep all three devices running the same Live version. Ableton updates maintain compatibility, but mixing old and new versions can cause plugin issues or missing features.
Back up your projects regularly using Live's Collect All and Save function. This packages every sample, plugin preset, and project file into one folder that works across all three devices. Store these backups on external drives or cloud storage.
Customize each device for your specific needs. Create custom instrument racks in Live that work well on Move's limited screen. Build Push templates with your most-used effects pre-mapped.
Clean your hardware monthly. Push's pads and encoders collect dust and oil from fingers. Move's touchscreen needs careful cleaning to maintain responsiveness.
What Happens When Your Workflow Clicks
Once you integrate all three tools into daily practice, your production speed increases dramatically. Ideas captured on Move during downtime become finished tracks faster because you've already worked through the initial creative decisions.
Push keeps you in creative flow longer by removing the friction of mouse-based editing. Live ties everything together with professional mixing and mastering tools. The real power emerges when you stop thinking about three separate devices and start treating them as one continuous instrument.
Your workflow becomes location-independent, performance-ready, and creatively unrestricted. That's when the Ableton ecosystem truly clicks.
Related Articles
Quantum Leap: Room Temp Superconductors Unveiled
Discover the groundbreaking world of room temperature superconductors and their potential to revolutionize quantum computing and technology.
Sep 6, 2025
Tech's Role in Florida's Vaccine Mandate Debate
Florida's move to eliminate vaccine mandates underscores the critical role of tech in public health. Discover the intersection of innovation and policy.
Sep 4, 2025

Transforming Gaza: From Conflict Zone to Tech Hub
A leaked plan from the Trump administration reveals a bold strategy to turn Gaza into a thriving high-tech hub. Discover the potential.
Sep 3, 2025